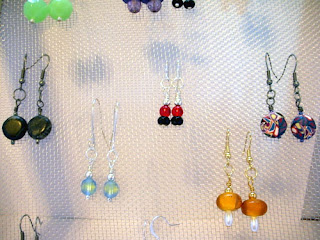
Let's start with the tutorial.
Several years back, I made myself a variety of jewelry holder/displays. Here's the one I use for my earrings.
It's a fairly simple process that I thought I ought to share with you, since so much of the jewelry I've been selling has been earrings.
First, purchase a WOOD frame from the thrift store.
This one had no glass, the border was nice and wide, and it was $.25 = SOLD!
Then gather your supplies:
frame
safety goggles and dust mask
sanding block or paper
paintbrush(es)
gesso
acrylic paint
crackle medium
sealer of some sort
pliers
picture hanging kit
hammer
scissors
window screen (I highly recommend the fabric kind over the metal kind)
staple gun
glue gun and sticks (if using metal screen)
foam board (optional)
E6000 (optional)
1. Don your safety goggles and dust mask and then quickly sand all areas to be painted (you just want to rough it up so the gesso sticks)
2. Paint a layer of gesso over the frame
3. Paint the frame your contrasting base coat. (I used basic black.) Allow it to dry and then add the crackle medium. (Of course, read the instructions on YOUR crackle medium as they may differ from mine.)
4. Apply contrasting color (this was an aged parchment color) over the crackle medium and watch the crackle go to town. Once paint is dry, apply a layer of sealer for protection.
5. Turn over picture frame and remove any hardware. This probably could be done while sanding, but I waited. I used pliers to pull out these meal tabs.
6. Cut your screen a little larger than the hole in the frame and staple it in. [BE WARNED: If you do use metal screen, use extreme caution. This stuff will poke and pinch and scratch you all up. I only used it because it's what I have on hand. I seriously recommend getting the fabric kind.] I did NOT just staple back to front as my staples were longer than the thickness of the frame. Instead, I stapled from the side OUTWARD where the wood was thicker.
7. Hammer in any staples that are still sticking up a bit. Trim the edges of the screen. Since I used the metal stuff, I used hot glue to cover all the exposed edges of the metal screen for protection. It's not pretty, but it works and it's the backside anyway.
8. Turn over your frame and decide which way it will hang. Lay out the screw-in hook/loop pieces from the picture hanging kit along the bottom front. You can measure it out if you feel the need to be precise. I started with the outside two hooks then did the center one and worked outward.
9. Add a hook for hanging to the back.
Additionally, I added some foam board to the bottom back of the frame with E6000 so that the frame pushes out from the wall a bit, giving the earring backs a little more room.
Here's the finished earring holder.
AND. . .it's part of what I'm giving away.
In addition to the earring holder, I made up twelve (yes 12) pairs of earrings to start off the winner.
These are just some basic earrings and nothing too fancy, but they're a start.
So, how do you win the earring holder and twelve pairs of earrings?
I'm giving you several options for entering
1. Leave a comment on THIS post for ONE entry
2. Go to the Crafty Hope Jewelry Facebook Fan Page and become a fan (if you are already a fan, that's fine too) Leave me a comment on the FAN PAGE (NOT my personal page) that you're a fan and you want to win. This will give you one entry.
3. Follow CraftyHope Twitter (if you are already a follower, that's fine too.) To enter, you need to send me a DM (direct message) that you want to be entered into the giveaway. (I will send you a DM back confirming this entry)
So, you can get THREE entries. Comment here, comment on Facebook, and/or DM on Twitter. You can do one or all three of them. Each give you one entry.
You have through Thursday Jan 20, 2011 to enter. I will be drawing the winner on Friday, Jan. 21, 2011.
GOOD LUCK!


This is very cool! We did something similar for use at our shows, but we used a door insert, one of the multi-paned ones. It holds a LOT of items and hangs nicely from our show tent bar when we're outdoors. I like yours for the shadowbox effect, though!
ReplyDeleteYou are a truely gifted woman! Crafty Hope is definately a perfect name for your business. I loved the flower earrings I bought from you and have worn them this week in fact. My future daughter Julie loved the bracelet you made for her as well. May God bless and keep you!
ReplyDeleteVery nice and you know I love your earrings!
ReplyDeleteI made a HUGE one of these for my outdoor craft shows, added flowers and vines to the top -- I liked it for earrings!
ReplyDeleteLove it, what a great idea :)
ReplyDeleteLove the idea. Many yrs. ago had done a frame with valour covered padded insert for pins. Looked very pretty on wall. Love all the things you do.
ReplyDeleteI'm in. Who doesn't love a giveaway?!? Plus, you could save me some Valentine's shopping ;)
ReplyDeleteBen
What a generous giveaway! I'm in!!!
ReplyDeleteWOW, Hope. I like that idea. It would be a fantastic gift idea for some of my friends this year. Cool!
ReplyDelete