Peek at My Week: April 22-28

This past week was a pure blur of busy-ness. 

I was able to keep up with #The100DayProject as I made a wise decision to select a medium for each week. This past week, I unearthed some small wood shapes, intended to be brooches. These have been buried in my craft room for YEARS! I bought them at a yard sale for 10 cents each and haven't been able to bear to get rid of them for one reason on another. It just so happens that I had exactly seven of them!
The wood in 20 was altered with ink spray and coated with gold glass glitter. I simply added a Gelli print on which I stamped the word. It was then sealed. 
I have to admit that I worked a little on 21 the day before to give the black paint and crackle paste a chance to dry. The picture is from some of Tim Holtz's supplies. Once sealed, I added the small rose (from an old jewelry piece). A bit of gold paste was rubbed on the crackle for a touch of shine.
I wanted to be a little more experimental on day 22. Again, I turned to some more of my Tim Holtz supplies, this one an acrylic facet. The faceted piece was slightly larger than the wood base, allowing the hole to hang down for a charm. I added a rose image from an old book. Alas, the glue I used didn't dry as clear as I had hoped.
Again, I worked a little ahead for 23: painting the piece and gathering and stacking the button and beads. They were wired together and glued to the base. A gold paste was added to accent the shape. 
I wanted to stretch the limits of making these brooches; so for 24, I decided to add the eye screws from which to hang beads. I selected antiqued copper eye screws. These brought rust to mind so I dug through my stash for some small bits. The screw heads I unearthed were added with dark accents around them. A bronze paste was used around the edges.
Upon waking on day 25, I knew I wanted to do some tiny paper-cutting. I thought all my elements would be cut from paper, but once I realized how hard it was to do the grass, I painted the rest of the scene.
On day 26, I wondered if I could use embossing powder on the wood and color in the image. Apparently, I could! I used Intense color pencils to ensure their staying power. 
I think 21 and 24 are my favorites of the bunch. Which are yours? 

Like I said, the rest of the week was an absolute blur. 
The only interesting thing from Sunday was breakfast - berry parfaits. They were as tasty as they look!

Monday was my oldest niece's birthday. 
Eighteen! I can't even...

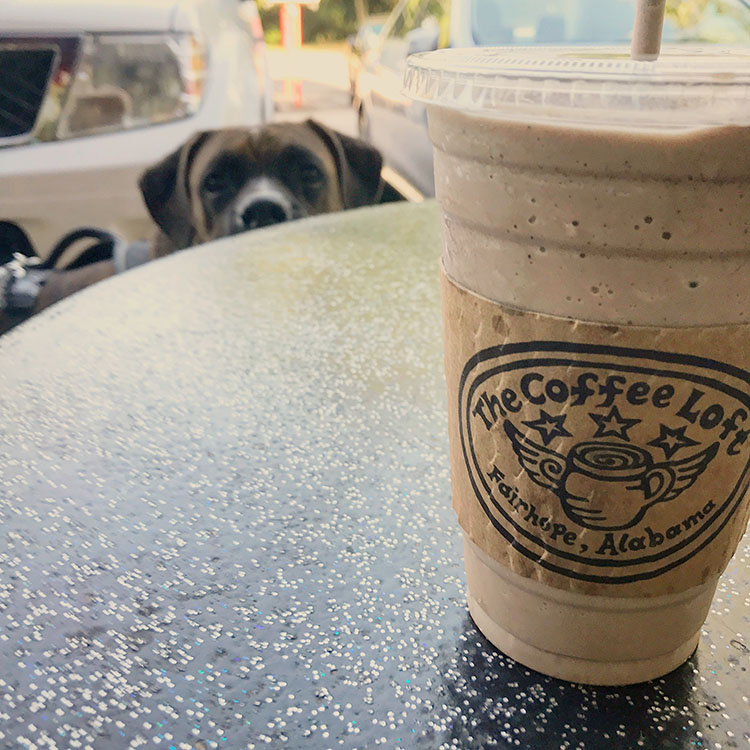
I spent much of Tuesday busy, busy. But I took the time to spy this little guy. 
Sorry that he's upside down. That's just how he hangs. 

Wednesday was another birthday party!
That niece is now 15. Where does the time go?

This is what she requested on her cookie cake. For real.

Thursday was another day out and about.
I gathered almost a full basket of blackberries (dewberries) from the yard. I'm hoping to try to make jam with them. Can you see the berry stain on my hand under the basket? Ha!!

I was able to get a little work done on Friday and listed this beauty of a necklace

We had dinner at our friends' house Friday night. They made us an amazing Greek meal and then made sure to show me the baby birds that had hatched in their faux plants on the front porch. 
Oh my gosh! So cute!!

Saturday was a busy, but fun day. We did more cleaning around the pool area before actually getting in.
Well...kinda. We floated on the pool. It's still much too cold to enjoy it completely!

And, I had to throw this picture in because she's just too adorable. Right?

I closed the day with a new obsession.
I had the sudden urge to practice drawing faces. So, I drew and scribbled and drew! I'll have to share more of them at a later time.

That wrapped up a busy week. Somehow, at the end of each one, they all feel so busy. I guess there's nothing wrong with staying busy.

How have you been filling your time?

Jewelry-Making for Beginners Part 8: Making a Wrapped Loop

I believe that making something with your own two hands is one of the greatest joys and sources of fulfillment. To help spread that joy, I've created a series of how-to tutorials on the basics of jewelry making. This is the eighth installment in the series. You can find links to the others below.

Beads
Other Supplies
Opening and Closing a Jump Ring
Making a Simple Loop

In this part of the series, I'd like to show you my favorite technique: making wrapped loops.

The tools and materials for completing this technique are the same as those used to make a simple loop but used in a slightly different manner.
You'll need a headpin, eye pin, or wire; round-nose pliers; chain-nose pliers; flush cutters (or other wire cutters); and a bead (or beads).

Simply slide your bead(s) onto the wire.
For this example, I'm using a head pin. If you're using wire without a stopper on the end, I would recommend creating a loop (simple or wrapped) on one end before adding the bead. Use your round nose pliers to hold the wire and bend it above the plier. Remember that the closer to the tip of the piers you make the bend, the less area you have to wrap. I tend to bend at almost the tip. However, if you want more space, move the wire closer to the handle before making your bend.

Adjust your pliers so you're holding the wire above the bend.
From there, wrap the wire around the round nose. You will likely have to adjust the pliers at least once to complete the loop. Again, keep in mind the size of the loop you want to make. Placing the wire close to the tip will form a very small loop while placing it closer to the handle will create a very large loop. Either way, you will want to make sure you have enough wire to form your wraps.

Continue to hold your wire with the round-nose pliers through the loop and begin your wrap.
Make sure you are twisting the wire so it goes directly around and down the small portion coming out of the bead. To wrap, you can either use your hands or your chain-nose pliers. I tend to use my hands until the wire gets too short to handle. Stop wrapping when the wire is touching the bead all the way around.

Most of the time, you will have a short tail of excess wire once your wrap is complete.
Simply use your wire cutters to trim the excess. I like to use flush cutters to make sure I can get as close as possible to the wrap. Remember to cover the wire as you cut so that the trimmed portion does not go flying.

Once the wire is trimmed, you will often have a small portion of the wire that continues to stick up from the wrap.
Use your chain-nose pliers to press down that short end and secure it. This is for aesthetic and safety purposes so that the small wire end doesn't catch on clothes or skin when your finished jewelry is being worn.

The process shown above creates a "neat wrap" in that the wraps are neatly stacked on top of one another. Another alternative is to create a "messy wrap" by wrapping the wire a little more haphazardly. This usually takes more wire. Alas, I don't have an example of a messy wrap as it's not really my style, and I have a hard time creating them. As with any new technique, I encourage you to practice this skill again and again. Your first attempts will likely not be perfect - unless you're some kind of jewelry-making savant.

Here are a few examples of how I've used wrapped loops in my own jewelry-making.
Some of the wrapped loops in each piece are circled in red. You can see that these are used to make charms and connect chain. Wrapped loops are great for creating secure connections with your wire.

If you do better seeing the skill in action, I created a video of the process of how to create wrapped loops for your jewelry-making endeavors.

I hope this technique really helps you up your jewelry-making game. Please don't hesitate to let me know if you have any questions, comments, or additional information about making wrapped loops.

Peek at My Week - April 15-21

I better get this post up before I let this week slip away from me! Let's get to it and have a peek at my week.
This little guy was one of my experiments for The 100 Day project. Actually, he didn't have the eyes originally, but I added them once I realized it looked like an elephant. (It was NOT supposed to look like an elephant, but I went with it once I realized it wasn't just me who saw it.)

Here are all the pieces I made for the project last week. 
They're mostly jewelry bits with a decorated envelope thrown in.

On Sunday, my wild blackberry (Dewberry) picking began in earnest.

After some yard work, Pat and I took the puppy out for a walk along Mobile Bay - stopping for coffee on the way home. 

Monday is almost always about running errands.
I had to re-organize the booth at Southern Antiques and Accents before Ladies' Night, do the grocery shopping for the week, and stock up on some books at the library.

Tuesday was a mixed bag of activities.
I started the day with some outside activities, including trying to collect eggs (that was waylayed by a laying hen) and spotting a still dragonfly while out collecting berries. 

I listed a pair of earrings in the Etsy shop (which are now in the hands of their new owner.)

Deciding that Tuesdays will now be my "baking day", I made a half batch of my Easy Granola along with Double Lemon Poppyseed Muffins to cover several breakfasts for the week. 

On Wednesday, I was at my mom's but was able to list this awesome Tin Edge bracelet (it also sold). Y'all should totally hit up the Etsy shop!

Thursday was all about making earrings for We're all Ears.
You can see that my first pair went through several versions (I kept trying to make them jellyfish) before settling on the more simple version I revealed. 

I also decided to bake just one more thing - this Mocha cake. 

I spent Friday cleaning house and working on projects in the craft room. That's where I was when I spotted a weird bug formation outside the window. On closer inspection, I found termites all over a stump. It was so freaky-cool. They were gone by the next day. (no worries.)

The pool's been looking better and better. Despite it still being quite cool, we worked all Saturday morning on getting the area around it in better shape. 

After lunch, we took Zoe down to the Earth Day Mobile Bay festivities next to the Bay. It was an absolutely beautiful day.

Since the pool area was in good shape, and it was a gorgeous day; we invited friends over to grill out. I didn't get a picture of all that but did capture the beauty of the Japanese Maple tree off our back deck. Check out the spectrum of colors!!

So, that was my week in a nutshell. This one is already nuts and it's starting to get away from me. What filled your week?


Paradise Calling Challenge for We're All Ears

Each month, Erin at Earrings Everyday poses a challenge for the readers. It's called the We're All Ears challenge. This month, she chose "Paradise Calling" as she was about to leave for the Humblebeads Bead Cruise and a paradise of her own. Today's reveal day! 

I suppose each person has their own vision of paradise, but mine has always, always been the beach. It's the water that calls to me - the weightless bliss of floating in it and the rhythmic sound of the waves. I will never get enough. It's lucky that I live so close to Alabama's beautiful Gulf Coast. 

And, while our beaches are superb, images from our vacation to Aruba many years ago are what sprung to mind. First and foremost, that crystal clear water was not to be missed.

I wanted to evoke the translucent quality, the blue, and the peacefulness of water with this first pair of earrings. 
I used fairy flowers from Mermaid Glass and lampwork glass spacers from StudioJuls. Silver-tone wire was chosen for its fresh feeling. These pieces were paired with bead caps from Patina Queen

Thinking about vacation and spending time at the beach makes me long for a rum drink or two. While in Aruba, we tried mojitos for the first time. They're definitely one of my favorite beach-side beverages. 
Made of rum, simple syrup, mint, soda water, and lime and served over ice; they are crisp and clean-tasting. I let the colors and feel of a mojito inspire these next earrings.

Green was an obvious choice, though I had a hard time deciding what shade, finally setting on these Czech glass ones to represent the lime and mint. Simple clear faceted glass rondelles were stacked on the top as the simple syrup and soda water. It needed a little something more, so I chose pewter-colored blanks from Vintaj and embossed them with squares to signify the ice. 

While mojitos are wonderfully refreshing, bushwackers are much heavier and more decadent. 
They're also made with rum, but include cream and/or ice cream, coffee liqueur, cream de cacao, coconut milk, and chocolate syrup. These are blended with ice and often served with whipped cream and a cherry. They're like a milkshake, with alcohol.

I used mother of pearl buttons because they're as heavy and creamy as the ingredients blended together. Deep brown glass pearls are silky and remind me of the chocolate. I topped the pearls with little white beads like the whipped cream on top.

Even after a full day at the beach, at the end of the day, I can hardly resist a beach sunset. My phone and camera are full of sunset photos. Here are just a few of them.

But, the one I let guide my inspiration was yet another photo from Aruba.

I really love how the colors just meld together. It's hard to make beads meld, but it was easy enough to stack the colors. 
I used faceted glass beads in orange, yellow, and deep blue to represent the sky of a sunset. Then, I embossed dark Vintaj blanks with a pattern that looks like moving water. 

I have to admit that I made all of these within an hour or two in a very rushed manner. But it was so nice to just think about the beach for a little while. Thanks for that bit of a mini vacation, Erin. 

I'm looking forward to seeing how everyone else interprets this challenge. Make sure to head over to Earrings Everyday and see for yourself. 

DIY Junk Drawer Wind Chimes

Earth Day is just a few days away, and enjoying the outdoors seems the right way to celebrate.  Making a wind chime from "junk" to honor the day and brighten your own outdoor space could be the encouragement you need to get out there. This project uses materials that might otherwise wind up in our landfills. I hope it reminds you that istead of polluting our environment, we can enhance it! 

While preparing my Earth Day Project Inspiration post last week, the upcycled wind chime caught my attention (and many of yours too). I did an image search to find the original post but to no avail. Being inspired by my own inspiration roundup, I decided to make my own wind chimes to share.

It was as simple as gathering junk drawer items: keys, broken jewelry, buttons, crystals, hardware, etc.; stringing them together; and attaching them to a base. Since I wanted to use recycled items as much as possible, tuna cans were the base. Of course, any kind of can would work, or you could use cookie cutters like the original image. 

Spring has finally sprung here in South Alabama (I think). While it's still a little chilly in the mornings, the afternoons are sublime. And, I've been finding it hard to stay inside when it's been so glorious outside. These windchimes have brightened up my outdoor space and made it even more inviting. 


I'd love for all of us to find a way to recycle some of the junk we have in our homes and enjoy nature, so I made a video of the process used to make the wind chimes.
If any of the steps are unclear or you have any questions about how to make your own, please don't hesitate to task. And, if you do make one, please share it.

These were so very simple to make. I can't wait to create more and try to use up all the excess supplies I have collected. What a wonderful way to upcycle!


Southern Antiques and Accents - April Ladies' Night

I stopped in at Southern Antiques and Accents in Fairhope (Greeno location) to update the booth a little and make sure it's ready for Ladies' Night. 

Hey! That's tonight! If you're in the Fairhope, AL area this evening, you ought to drop by SAA and take advantage of the sales. Everything in the shop is usually 10% off and some of the booths have even more savings!

As for what's in my booth, I only added a few new pieces from last month and swapped around a couple others. Mainly, the top display was changed out. 

Here's another shelf where the changes are noticeable. 

If you want to see more, you ought to head over to Southern Antiques and Accents to check it out!


The 100 Day Project 2024

Yesterday, the 100 Day Project for 2024 started (it's not too late to join in!!) I mentioned last week that I would give you a heads-up ...