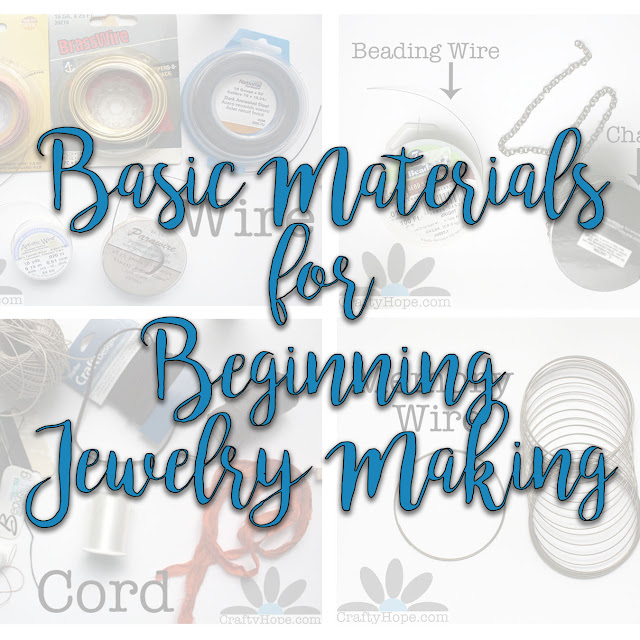
Jewelry-Making for Beginners Part 2: Materials

Basic jewelry-making is a hobby that I believe anyone can learn. Sometimes, all it takes is the right equipment and a little explanation. I'm hoping to provide that to you in this series of posts.

Previously, I went into details about the tools needed to begin making jewelry. In this second lesson, I'm going over some of the materials used to make jewelry.

Like the first part of this series, I also made a video of these Jewelry-Making Basic Materials if you'd rather watch than read, or if you like to do both.

Now for my explanation on jewelry-making materials.

Wire: I only begin with this because it's my personal favorite material. Wire comes in a variety of metals, colors, and shapes. I've found round wire, flat wire, square wire, half-round wire, twisted wire, and so on.  In addition, there are several choices in wire hardness. However, you'll find this option most often with higher-end wire. It typically ranges from dead soft to half hard wire, with dead soft being more pliable. One of the most important things I can tell you about wire is that it is sized by gauge. The smaller the gauge of wire, the thicker the wire. For example, 16 gauge wire is thicker than 24 gauge. Keep in mind what you'll be using the wire for before selecting the gauge. You can purchase wire from craft and bead shops, but I often get mine straight from the hardware store. Wire is useful for making beaded chain, ear wires, clasps, bangles, wire-weaving, stone wrapping, and much more.

Chain: This is probably the most basic of all jewelry-making materials. Chain generally consists of links of metal or other material connected to one another. It's perfect for simply adding charms or a focal piece to easily make a completed piece of jewelry. As well, chain makes a great accent like tassels or helps extend too-short pieces.
Beading Wire: Also called bead stringing wire, beading wire is a material created especially for jewelry-making. It comes in spools and is made of tiny, twisted wires coated with nylon. The nylon helps protect the wire and extend the life of your projects. Beading wire is most often used in conjunction with crimp beads to create necklaces and earrings. It can be found in a variety of sizes and colors.

Cord: This is probably the widest section of jewelry materials. Cord includes waxed linen cord, beading thread, sari silk ribbon, leather cord, invisible nylon cord/thread, hemp, and many, many more. Waxed linen is waxed to increase its durability and workability. It (as well as hemp) are often used with knotting/macrame techniques. Beading thread is intended specifically for jewelry-making. Most often, it's used with seed beads for tiny, intricate work.  Invisible nylon cord is much like fishing line (which I have used before) and usually used when you want the material to be as invisible as possible. Of course, each of these cords has a great many uses beyond the ones I've mentioned.

Memory Wire: I almost left this one out of the video, and it's one of the simplest to use. Memory wire comes in a coil and retains its shape, hence the name. When pulled, it springs back into shape like a slinky. I've found ring, necklace, and bracelet memory wire; but the bracelet shape is by far the most popular. It's most often found in a silver-tone, but other metal tones are also out there.

A material I've left off this list is Elastic. It's not something I use or keep on hand. I admit that I have trouble tying the elastic to my satisfaction, even with glue. As well, much of the jewelry I get from friends to fix are bracelets that have been strung on elastic and have popped. It's simply not a reliable material. As such, I don't use it personally.

I know that I've omitted a ton of more in-depth details about each of these materials, but this should sum it up for those just starting out. However, if you've got something to add or have questions, please don't hesitate to let me know in the comments.

Linking up at Sweet Inspiration Link Party, Dare to Share Saturday, and Saturday Sparks Link Party at Pieced Pastimes.

The 100 Day Project: Make 100 Earrings 1-20 and a GIVEAWAY!

I did say giveaway - details are at the bottom of the post.

I've been an earring-making fool!

I don't want to jinx myself, but I've gotten my earrings made for the first 20 days of The 100 Day Project.  The project takes place on Instagram and its purpose is to encourage creativity for 100 days. Each participant picks a creative endeavor: small, large, progressive, whatever and does it each day for 100 days, using #The100DayProject as well as their own unique hashtag. I announced my #Make100Earrings intent several weeks ago in a post about all the challenges ahead of me. As well, to make it easier on myself, I prepared a box of earring-making supplies that I can take with me wherever I go. 

Today is day 21. Before I work on the earrings for today, I thought I'd share here those first 20 pairs.
Days 1-4
1: Those large beads needed to come out of the box since they took up so much room. Tiny yellow Chinese crystals from Znetshows.com and copper spacers and beads were tied onto off-white waxed linen cord to make a little fringe and accent the large beads.
2: Really simple and more my "romantic-rustic" style, these earrings were made with crystal teardrop briolettes and salvaged gold-tone beads.
3: I wanted some bright & colorful beads for this pair. Turquoise, orange, and violet beads are stacked with black and white striped beads and a silver spacer. This single stack on a headpin hangs from a cultured sea glass ring from ZnetShows.com
4: These are my favorites in this set. The dangles are Vintaj blanks that I had altered. They're paired with bright teal beads and rhinestone spacers. Love!

Days 5-8
5: I hadn't used any of my art beads yet. Since I was home this day, I dug through my artist-made stash and found these polymer clay beauties from Heather Powers of Humblebeads. To accent them, antiqued brass spacers, a bead cap, and a little glass flower were added. These are another favorite.
6: Wanting to do something simple, I used some silvertone connector links and a smokey-gray bead to make these. Easy-peasy. Done!
7: It was a beautiful day and felt so very summery. This inspired me to make these bright, bold earrings. 
8: Again, I dipped into my stash of altered Vintaj blanks to make these earrings. They dangle from a stack of small, coordinating beads.

Days 9-12
9: I hadn't included any buttons so far, and those amazonite rectangles were calling to me. I paired those elements with a short length of antiqued brass chain and called it a day.
10: Working from my travel box this day, the copper rings caught my eye. Simple dangles of white & clear beads completed the earrings.
11: These were complete spur-of-the-moment earrings. All of the components came from the earring box, but I picked them out hurriedly to make the pair. I think it works.
12: I knew this was going to be another hectic day, so I grabbed these beautiful glass beads and simply let them dangle from balled head pins.

Days 13-16
13: It was Easter. I wanted a basket. Finding these brass stamped baskets, I colored them with layers of Vintaj Patinas before dangling them from a few ZnetShows.com glass beads.
14: Feeling inspired by all the growing things outside, I was compelled to make some green earrings. I dove into the green drawer of my bead cabinet. Silver chain and head pins completed them. 
15: Like the first pair of earrings I made, I just wanted to get these big pink beads out of the container. As well, I'd seen other designers use filigree bead caps as a base for chandelier earrings, so I let that inspire me. With matching seed beads, I worked these up as quick as possible. When my husband saw them, he thought they looked like octopi and suggested I add eyes. I did try, but the medium I used wiped right off even after hours and hours of dry time. I may try it again later, but wanted these done before the end of the day. So, I left them as they were.
16: This was a busy day of family visiting. As such, I picked out these beads and simply wired them together. Simple and pretty.

Days 17-20
17: I didn't have much time before we headed to the beach to make anything. Pat suggested I collect shells to make my daily earrings. As you can see, that's exactly what I did. I know from previous experience that I can find shells with a single hole in them. Here example #1 and example #2 of other jewelry I've made from found shells. I made sure to only collect tiny ones. At home, I evenly sorted then stacked them onto head pins (using a seed bead to start). However, while bending the wire to make the loop, several of the shells broke - hence the space at the top of the earring on the right. I got them made at least! They can't all be winners.
18: I picked through some of the pairs of beads I had from what Kari sent me for the Bead Peeps Swap N Hop and selected the purple leaves and cube. The spacer and other beads came from my own stash, but worked out nicely.
19: After a full day poolside, I realized I hadn't made any earrings yet. I picked up the mother of pearl buttons, tarnished silver beads, and hematite-colored wire that were on my desk for another project and whipped these up.
20: Yesterday was my oldest niece's birthday. With her in mind, I selected the blue lampwork beads that had been freebies from Mermaid Glass when I ordered something else (at least that how I had them marked!) She likes blue almost as much as I do, but also loves black. I've had these vintage black beads in my stash since the dawn of time (or sometime there abouts). Antiqued silver tone bead caps and findings finish the earrings. 

For the most part, I'm happy with the the earrings I've created. I know they're not all winners or something I'm going to try to sell (the shell earrings!!). However, I'm really pleased that I've been able to get a pair made every day despite a busy schedule and vacation. The 100 Day Project is working for me!

Oh, I did say something about a giveaway didn't I?
Which two pairs are your favorite? Let me know in the comments and leave your e-mail address by May 13th. I'll pick and announce a winner on May 14th (Mother's Day). You just might win your favorites. Oh, and this is open to only US residents. Sorry!!

Week in Review - Spring Break 2017 (Woohoo!)

We've been on vacation all week. It's really been a staycation as we just enjoyed being home and visiting with friends and family. Two of the nieces stayed with us most of the week.

We brought one home with us Easter afternoon. She spent the afternoon bonding with the puppy.

Monday was kind of a lazy day (and generally picture-less) as we did some shopping, played games, and hung around outside.

Tuesday involved us buying a third kayak (so we have a spare when someone else wants to hit the water with us.) We didn't waste time taking it out for a test run. The niece is a natural in a kayak!

Wednesday morning I went and picked up the oldest niece before one of my brothers and Sister-In-Law arrived with their kids for an afternoon of some family fun.

Spring Break just wouldn't be right without a trip to the beach. We didn't plan to stay long so we took minimal supplies with us. The nieces actually worked together to make a little shade for the oldest. The youngest and I searched for shells and played in the sand while Pat played in the waves. (It was a little rough and the current was stronger than I felt comfortable with.)

The oldest niece's only request for her visit was to do some art. So, Friday she started on a string art project that we'll finish later while her sister worked on soap-making. I have to say, it's difficult to do the melt-and-pour soap when you don't have a microwave. I don't recommend it! We also tried shaving cream paper marbling with alcohol inks. It was messy, but fun.

Once the crafts were cleaned up and lunch eaten, we packed up for me to take them home. Since youngest niece is a big fan of unicorns and Starbucks, we made a little stop for one of those new frappuccinos. She loved it. I didn't even taste it.

With the house free of kids, we spent Saturday being as lazy as possible poolside with a friend. It was blissful.

Today is oldest niece's birthday, and we're gearing up to go to my mom's a little later. For now, we're just soaking in the last day of vacay and enjoying the quiet.

How has your week been?

Jewelry-Making for Beginners: Part 1 - Tools

Making jewelry is a hobby that anyone can pick up easily. I did. Over 15 years ago, after seeing a necklace a friend made, I dove right into the craft. With much practice, many years, and lots of trial and error, I think I finally have it. And, I want to share what I know and how I do it. As such, I'm working on creating a series of tutorials, videos, and information to spread the joy of creating as best as I know how. 


This is the first in that series that will consist of videos on my CraftyHope YouTube Channel and additional information and pictures here on the blog. 

This series begins with basic information on the tools, materials, supplies, and whatnot needed to get started. Today's lesson is on tools. For the most part, this covers pliers.

Let me start by saying that it's not necessary to go out and buy the most expensive pliers you can find. I’m still working with many of the inexpensive ones I got many, many years ago. Of course, if you’d rather work with the best you can find, go for it. Alas, I don’t have any recommendations on brands. Buying a kit is a great way to start. They often have the basics covered. 

As a note - I have seen sets of tiny pliers. While these are super cute, I would not recommend getting those as you start out, unless you have really tiny hands. Getting something that fits your hands as comfortably as possible will make using them less tiresome and more enjoyable.

In my opinion, there are three main pliers you should have to begin your jewelry-making journey.
Wire cutters: As they are named, these are used for cutting wire. Keep in mind that thicker, heavier gauged wires will require more heavy-duty cutters. You can seriously damage and dull your cutters if you try to cut something too heavy. I’ve made due in a pinch with nail-clippers for some wire. Wire cutters come in a variety of shapes, sizes, grips, weights, and uses. Please note that memory wire is some of the toughest stuff on earth and will require more heavy-duty or specialty cutters. 

Chain-nose pliers: These long, skinny nosed pliers are a main staple of jewelry-making. The flat inner surface of chain-nose pliers is great for holding things stable while working with them. They are great for opening and closing jump rings, holding loops while wire-wrapping, holding and maneuvering small findings that might be too fiddly for fingertips, and many more tasks. Take a look at the jaws of yours. Some have ‘teeth’ on them while others are flat. Ones with teeth can scratch and mar the surface of your metal but can also give you better hold and control. Weigh your options and pick what’s best for you.

Round-nose pliers: Used to help create loops in wire with their round shape, the tips of these are small and get larger as you move toward the handles. This design gives you options as to the size of the loops you make. When starting out, it might be a good idea to make several marks on your round-nose pliers with a permanent marker or nail polish to indicate specific sizes. This will help you be more consistent in the size of your loop-making. Round nose pliers can also be used to open and close jump rings and hold/maneuver small parts. However, their rounded surface doesn’t make them ideal for these purposes. I will say that there is some discussion about the shape of the pliers when they are closed. I like to have as little space between the jaws as possible when they are closed. That way, I know that any wire (even the tiniest gauge) can be held securely. Other designers don’t really care. It’s a personal preference for sure. 

There are a few other tools that can be added to this list of the basics.

Flush cutters: These are a type of wire cutters. They’re great for cutting flush against a surface, hence their name. The small tip on flush cutters help them get into some of the tightest spaces.

Bent-nose pliers: As you can see, the tips of these are bent, hence the name. Apparently, these pliers were initially developed for electricians to use much like tweezers. While I can see the importance of that, I personally just use bent-nose pliers by holding them in my left hand (with my chain-nose pliers in my right) to open and close jump rings and loops as well as to hold and manipulate objects. 

Crimping pliers: These are used to securely smash crimp beads and tubes closed on beading wire. They are not completely necessary as a pair of chain-nose pliers can also get the job done. However, crimping pliers are designed specifically for this purpose and do work more effectively than the chain-nose pliers. I’ll share in a later post/video how to use them.

Scissors: An obvious tool in any creative person's stash, scissors cut objects. They are used specifically in jewelry-making to cut  materials such as thread, fiber, leather, cord, etc.

There are a variety of other types of pliers and tools you could add to this list. I know I personally have lots more. However, for a beginner these are a great starting point. As mentioned above, you could get by simply with the first three on the list. 

The video I created for this first part of the jewelry-making series can be viewed below. (If not, please follow the link.)

If you have any questions, corrections, additions, or whatnot; please feel free to let me know. Also, comment if there's something specific you want to learn so I can make sure to include it in the series.

Linking up at Talk of the Town and Think Tank Thursday at Saving4Six.

Easy Easter Decor DIY

I know Easter is l just a few short days away, but I want to share the couple of decorations I made from inexpensive materials as some inspiration for the little time that's left or for next year.

To start, I purchased this wall-hanging decoration at the Dollar Tree.
I really like the image of the chicks and nest in the center, but the glittery frame just wasn't my thing. I knew it had to be altered.

Fortunately, the back of it was uncovered chipboard.

Start by coating the egg-shape with a layer or two of gesso before using Mod Podge to cover it with torn pages from an old dictionary.
Be more concerned with covering the frame completely than with whether the pieces hang off or not.

Once the glue is dry, use scissors and a sanding block to remove the excess dictionary paper.

To tone down the words on the pages, paint the frame with a layer or two of watered-down gesso.

Here's where the fun begins! Stamp several colors of Distress Ink onto a non-stick craft sheet and spray it with water.

From there, quickly dab the frame in the ink to cover as much area as possible. Pick up and move the frame around to get different colors in different areas. Try not to drag it through the ink.
This is how it looks before the ink dries. LOVE!

While waiting for the ink to dry, punch out letters from some Grungeboard, coat them with gesso, and paint them in a pretty violet shade of craft paint. (Of course, you could use stickers or other letters and any shade of craft paint you want.)
It doesn't take long for everything to dry. Once it is, glue the letters onto the frame.

I worked on filling the center of the frame between steps. This started with basic, plastic Easter eggs. These were also from the Dollar Tree and had two holes in their tops and bottoms.

Measure out about how many would fit in the frame, with space between. Then, use waxed linen cord  or other material (fishing line would work) to string the eggs together. Knot before and after each hole, using one short strand of cord for just the top of the first egg and one longer strand for the rest of the eggs. This longer one should begin at the top of the last egg and end in the bottom of the first egg. Let me also not that waxed cord will stretch some. I advise you to pull and stretch it a little so it doesn't do it on its own. (I did not, and I regret it.)

Here's a really bad diagram of how these were tied.


Once the eggs are strung, secure them with washi tape. (Masking take will work just as well.) Collect your Mod Podge and dictionary paper again for the next step.

Tear the paper into smaller pieces. Stick it to the eggs by painting on the Mod Podge, layering on the paper, coating the paper with more mod podge, and rubbing the paper flat (I used my finger). Start around the holes with the cord first. Also, begin with larger pieces of paper, then use smaller pieces to fill in missed areas.
Allow the decoupaged paper to dry then attach the string of eggs to the frame by simply tying them on.

Another quick decoration I created used a frame from the thrift store.
I realized that the one on the top there (with the picture) had no glass, but that the picture is just a canvas board that pops in and out pretty easily.

See!

When I painted the egg frame with gesso, I went ahead and coated this frame and the canvas board all at once. From there, sketch out your general shape onto the canvas board in pencil.

Sort through your buttons to get the colors you want. I went for pastels to keep with the general Easter theme.
Once you have what looks like enough buttons, simply glue them down in your shape with gel medium. I used a slow-drying medium so I could move them around as needed. Please note that once the medium coats the pencil marks, you will be unable to erase them. Once your buttons are secure, erase the pencil marks that you can and paint over the rest with a thin brush and gesso.

Once everything is dry, pop your canvas board back in the frame.

Arrange your decorations on the wall in a pleasing pattern.
Because of the window and door on either side of where I hung these, I had a difficult time getting good pictures, no matter the time of the day.

In any case, here's a better look at them.
After the inks dried on this, the colors toned down a bit and are fabulous!

The buttons for this are not near as dark as they look in the picture. Like I said, the lighting was wonky.

I'm so pleased with my happy, little collection that came together quickly and inexpensively.

I hope this post inspires you to take a look at the supplies and decorations you may already have (but don't like anymore), and alter them to suit your tastes more.

 Happy Crafting!!

Bead Peeps Swap N Hop Reveal

Today's the day we've been waiting for: the 3rd Annual Bead Peeps Swap N Hop!

Members of the Bead Peeps Facebook Group were assigned partners and swapped beads. We were to send at least one artisan component. As well, the packages had to include a focal, a clasp, and/or beads. I was partnered up with the fabulous Kari Asbury. The link goes to her Instagram, but you can find more of her beautiful work on her website: KariAsbury.com. Here's the pretties that Kari sent me.
You can see these in more detail on my Bead Peeps Swap N Hop: The Exchange post. Kari sent me many, many treasures! Included in the mix were several items made by her, ceramic elements from Gaea, more ceramic pretties from Spirited Earth, a handmade pendant from Tesori Trovati, some WoolyWire, sari silk ribbon, and a bright mix of glass beads.

As an added challenge, Linda (the group's administrator and our hostess), encouraged us to have duplicates of what we sent out partners and make something from that. I thought this challenge sounded interesting and always love to see what different artists do with the same materials, so I played along. Here's a look at both what I sent to Kari and kept for myself.
The artisan component in my mix was the crown pendant from Dry Gulch on etsy. I also altered some brass folder rings with patinas in an attempt to make them match the crown. As well, I threw in a brass clasp, ceramic buttons, and a mix of glass, metal, and stone beads.

Before I reveal what I made, I want to admit that I didn't use near all the beautiful pieces Kari sent me. There were so many! And, as excited as I was about the wooly wire, I just couldn't decide how best to feature it. However, I did use almost all of the pieces that Kari made herself. They just called out to me.

As soon as I got the pictures taken, I knew that the two dragonfly tiles were meant to be earrings. These emerged in no time.
They simply fell together! In addition to Kari's dragonfly tiles; I used two small amber-colored glass beads from the mix and small bits of the sari silk she sent. From my own stash, I added brass bead caps, jump rings, ear wires, and violet crystals.

Here's another look at these beauties.

I stayed in the groove with Kari's tiles and created a simple pendant with a few more of the beads Kari sent and some antiqued copper wire of my own.
Kari's "Gypsy Soul" pendant told me what colors to use, and I went with it. The biggest hurdle in making this necklace was actually finding copper ball chain, which I was adamant it needed.

I think it would look lovely layered with another necklace or two for a true gypsy look.

My favorite item in the package from Kari was the key with the rhinestones.
It was just SO ME! But, that made it even harder for me decide how best to use it. I kept trying to work it into a necklace. However, a spark of inspiration finally hit when I realized that the thin nature of the key would allow me to both bend it and punch a hole in it.

With those tasks done, I was able to create this simple bracelet.
I aged a piece of thick (16 gauge maybe?) brass wire. First, I formed a hook to work as a clasp. With another piece of wire, I turned loops on either end and bent the rest into a small arc. Antiqued brass jump rings connect everything.

I am ABSOLUTELY smitten with this bracelet. It is my precious.

Once I had those projects tackled, my attention was turned to the duplicate set. Kari and I both agreed that the crown was a bit of a larger pendant than either of us was used to working with. This was totally my fault because I just didn't pay attention to the size when I ordered them, they were just so pretty!! After some thought, this necklace came together.
With some of the same Czech glass beads and brass breads that I sent Kari, I made the front portion of the chain. Antiqued brass chain makes up the back as well as the fringe.

The back of pieces always interest me. It's like getting a peek into the inner workings. Since I had to fiddle with the makings of this one to get the fringe to hang just the way I wanted, I thought you should see how I did it.
From the jump ring at the top of the crown, I hung a few links of chain. At the bottom of this chain is a large jump ring onto which I threaded the various strands of chain used for the fringe. It worked perfectly.

Here's a look at the entirety of the necklace.
I decided not to add a clasp to this as it easily fits over any head.

And, here's a final (blurry - sorry!) look at all the pieces I made for this challenge.
Now, I hope you take the time to hop over to Kari's Blog and see what she created. I know I can't wait. As well, make sure to use the hashtag #BeadPeepsSwapNHop17 as you search Instagram for other reveals, or just hop though the list below!!

Enjoy the pretties!


Linda Anderson - Hostess - http://fromTheBeadBoard.blogspot.com 
Non-Seed Beaders
Linda Anderson   
Christina Hickman
Catherine LaVite
Barbara Price   
Kathy Lindmer
Linda Raggo
Marianne Baxter
Rachelle Walker
Gloria Allen
Ally Asato
Robin Lynne Showstack
Naomi Knafla   
Maria Rosa Sharrow
Dana Phillips 
Michelle McCarthy
Beth Blanc   
Hope Smitherman
Kari Asbury   
Shai Williams 
Betony Maiden 
Inge van Roos    
Kelly Hosford Patterson
Kristina Peck
Lori Schneider
Rosantia Petkova   
Erika Price
Claire Fabian
Rachel Mallis
Deb Fortin   
Nicole Rennell 
Joanne Bell
Johana Nunez
Sam Waghorn   
Natalie Davidson
Robin Reed   
Faye Wolfenden
Karin King
Divya  

Seed Beaders
Rebecca White
Palak Udeshi
Penny Houghton
Krafty Max   

Heather Canepa
Ginger Bishop
Katy Heider    
Renetha Stanziano
Becky Pancake
Tina Pawass
Mowse Doyle
Tami Norris
Minnette Miller
Veralynne Malone

Winding down the 100DayProject

I awoke the other day with many thoughts about the 100 Day project and decided to jot them down here to share with you. Some of the bits I g...