
The first change I made was to clean up the social media buttons on my right sidebar. If you remember, they looked something like this.
 |
| Ewwwww! |
And I was able to re-vamp that into this.
 |
| Ahhhhh! |
Fabulous right!? I'm guessing some of you might want to know just HOW I was able to do it. Well, with the help of the following.
- This post from My Favorite Things on how to add social media buttons. There are actually many, many posts out there similar to this one, but her instructions seemed the most clear and easy-to-follow.
- The links at the bottom of this Moms Make Money post. The post itself has a video with instructions on adding the links if you want, but I just needed some free social button images. (The last link with the cute color icons was the one I used.)
- Photobucket. Basically, that's where you save your social button images so that you have an online link in order to put them into the code.
4. (optional) My own limited knowledge of how to work with HTML from my time working at a website design company (though I just wrote the copy for the websites, I DID NOT write the code.) As well, my husband is a software programmer/coder extraordinaire and was able to help me get the buttons cooperate just the way I wanted them to.
Now, that's not all the changes I made.
- I also added a widget so that you can follow the CraftyHope blog by e-mail. I know that is becoming a popular option lately. Check out the widget just above my new flashy social media buttons on the right. This was super easy to add in Blogger.
- From your Blogger drop-down menu select Layout
- In Layout mode, you'll see several buttons in the middle of the screen that say "Add a Gadget", click that.
- A new window will pop open. Scroll down the list in that window until you see "Follow by Email" and click into that.
- From there, it's as easy as clicking save and making sure the Gadget is placed where you want it on your blog layout. DONE!
- A reply button was also added to my comments section. I've actually been trying to figure out a way to add this little button for MONTHS and finally found this post from Spice up Your Blog that made it way simple to do.
For a final dose of pretty, I listed these earrings today!
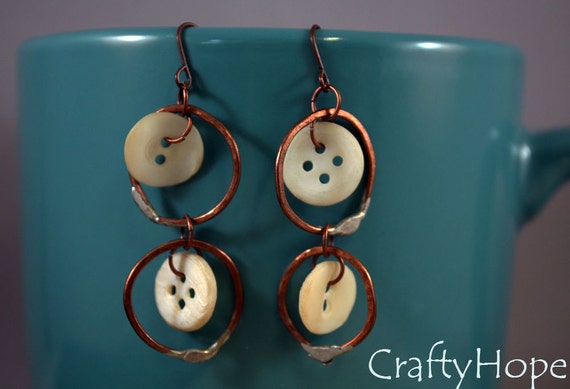 |
| Unique Delight Earrings |


These social media buttons are great and your blog looks much better. I've recently made some changes to my blog and I wondered how to add those buttons but wasn't able to find how to do it. Thank your for the links and the tips.
ReplyDeleteOh, Hope, thank you so much! I'm definitely going to add these to mine. They look much more updated and 'fresh'.
ReplyDeleteShirley- I'm so very glad I could help. I've been seeing those slick buttons on other blogs for a while so I finally broke down and figured out how to do it myself. I can't wait to see them on yours too! :)
DeleteGreat info Hope, thanks so much for taking the time to share!!
ReplyDeleteCory- Thanks. I knew it was some info that I've been searching for for a while so I guessed that others might like to find it too. (Plus I really wanted to show off my pretty new buttons! ;) ) I appreciate you swining by!
DeleteOn the social media buttons is this what is called "mapping"? I have tried to figure this out on my own and well the end result was get someone else to do it for a small price. I'm going to try and follow the instructs you used and see what I can come up with! Thanks for sharing!
ReplyDelete