As the temperatures begin to drop and the leaves start to fall, we all start to crave soups and stews and something warm in our bellies. A big bowl of chili is the perfect dish to warm you up inside and out. In fact, chili is such a comfort food for us, we eat it all year round. And since there's no way to make a small batch, we always have leftovers. Sometimes I freeze the leftover chili for later. Sometimes we just eat chili for lunch for a few days. I've even made chili-cheese nachos as a large snack. However, I've found that my favorite way to enjoy leftover chili is in a baked chili mac-and-cheese. It's more commonly known as Chili-Mac.
Let me admit, that I've only been using this recipe for a few months and may tweak it still, but since Fall is in full force, I thought I'd go ahead and share the basics with you.
It begins with leftover chili, straight out of the fridge.
I used about 2 cups of chili for this recipe but had way more than that. I'm sure you could also use a can of chili if you don't have any leftovers. At some point, I'll share my easy chili recipe. For now, let's focus on the Chili-Mac.
Go ahead and get your pasta started. I used about 8 ounces. That's usually half a box.
And, I tend to just use whatever I have on hand. In this case, I used cavatappi (corkscrew) pasta. Make sure to underboil your pasta by a few minutes so that it will cook to perfection while baking. When it's done boiling, drain and set aside.
Here's where we start making the cheese sauce. It's basically the same as making a macaroni and cheese sauce.
Start by heating a large pot on medium and melt 3 tablespoons of butter.
Once the butter is completely melted and a little bubbly,
add 3 tablespoons of all-purpose flour and begin whisking.
Continue to whisk until the flour is completely incorporated and the mixture is smooth.
Let that simmer for just a minute or two.
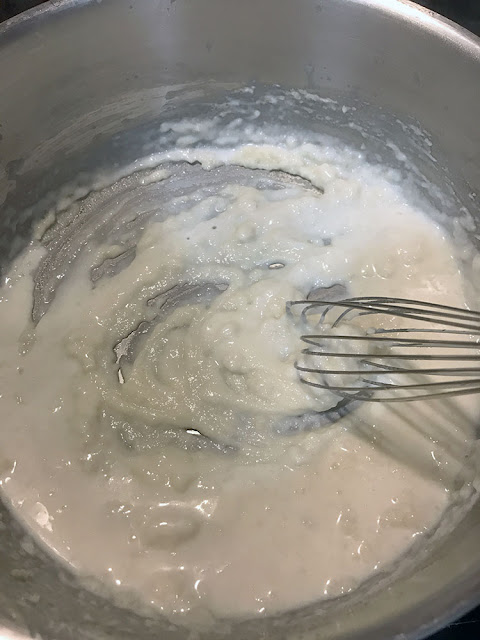
Slowly add and whisk in 2 cups of milk.
It will start out a bit chunky like above. This was just the first 1/4 cup of milk.
As you continue to whisk and add milk, it will smooth out.
Allow this mix to cook, stirring/whisking every once in a while, for several minutes to allow it to thicken.
Add in any spices/herbs you like.
I usually add salt and pepper, granulated garlic, onion powder, and mustard.
When the spices are mixed in and the sauce is silky, toss in about 2 cups of grated cheese.
For most batches, I go with a blend of white cheddar cheese and whatever else is in the fridge: fontina, colby-jack, gouda, swiss, parmesan. Seriously, whatever's in there. Mix in your cheese until it's melted.
Mix in your drained pasta so it's well-coated in the sauce.
And, basically, that's your mac-n-cheese.
Now we're going to elevate it by adding 2 cups of leftover chili.
I don't even bother to heat up the chili. It's already cooked and will be baking in a few minutes.
Stir until the chili is completely incorporated with the cheesy pasta.
This looks so good, I think chili may be back on the menu next week!
Pour the contents of the pot into a baking dish.
I like to top it with a little more grated cheese and a sprinkling of panko breadcrumbs. But, that's totally optional.
Throw that baby into a 350-degree oven for 20-25 minutes.
Then, enjoy the heck out of it!
Here are the full ingredient list and directions to make it easier to follow.
Ingredients:
2 C. Chili (leftover)
8 oz. Pasta
3 T. Butter
3 T. Flour
2 C. Milk
2 C. Shredded Cheese
Salt, Pepper, or whatever other herbs and spices suit your taste.
optional: additional cheese and panko breadcrumbs
Directions:
1. Preheat oven to 350-degrees.
2. Boil pasta a few minutes less than directed on the box. Drain and set aside.
3. Heat a large pot on medium, melt butter.
4. Whisk in flour until smooth. Allow it to cook for a minute or two.
5. Slowly whisk in milk until smooth. Let it simmer for 4-5 minutes.
6. Stir in herbs and spices to taste.
7. Add cheese and mix until melted.
8. Pour pasta into the cheese sauce and stir until noodles are coated.
9. Mix in chili until combined completely.
10. Pour chili-mac into a casserole dish. Optional: top with more cheese and some panko breadcrumbs.
11. Bake for 20-25 minutes.
12. Remove from oven and enjoy!
This has absolutely become one of my favorite meals. In fact, the last time I made chili, it was just so I could make this chili-mac a few days later. I hope you enjoy it as much as we do.
As a side note, this recipe was a little...soupy. While still amazing, the next time I make it, I plan to add an egg to the cheese sauce to see if that will help firm it up a little. Let me know how yours turns out if you try this recipe.
I've shared this post at the following link parties: Sweet Inspiration, Friday Frenzy, Flaunt it Friday, Made by You Monday, and Recipe & DIY Linky


Sounds yummy! My husband likes combining old food from the fridge to make something new and unique, because he can never make the same meal twice this way :) I make baked pasta almost the same way but don't add flour, just milk, eggs, some kind of melting yellow cheese and feta. And I have never thought of combining it with leftover meals - I have to think about that!
ReplyDelete