
I made the decision some time ago to create a series of tutorials to teach the basics of making jewelry in the hope of helping those just starting out, toying with the idea of making jewelry, or just wanting to figure out how to make a few things. The previous sections in this series were simply information-sharing as I (and a guest poster) explained
It's finally time to get to the meat of jewelry-making and learn actual techniques! To start us off is the most basic of techniques - opening and closing a jump ring.

With this one little technique, you can be completing jewelry pieces in no time. Remember that a jump ring is simply a ring of wire with a slit in it for opening and closing. Generally, jump rings are round shaped, but they can also be found in ovals, squares, triangles, etc. Their purpose is to connect one component to another. However, they can also be used as design elements or in chainmaille designs.
In addition to explaining this technique, I'm going to show you how you can use it to complete several pieces of jewelry.
If you want to see the skill and the making of the jewelry in action, you are welcome to watch the video of Opening & Closing a Jump Ring.
For now, here's the written portion. Let's get to it!
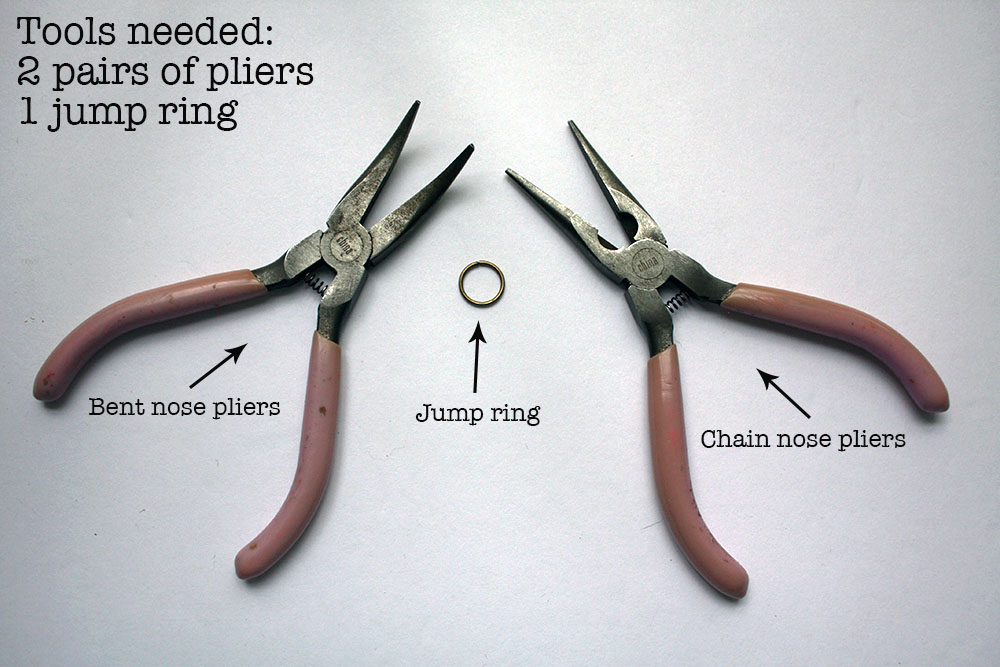
The tools needed to complete this skill are simple enough: two pairs of pliers and a jump ring.
I recommend that the jaws of the pliers be flat on the inside, without teeth, to keep from marring your jump rings. I personally prefer a pair of toothless chain-nose pliers and a pair of toothless bent-nose pliers. Flat-nose pliers would also work. And, if your pliers have teeth, it's completely fine, just be gentle. While this task can be performed with round-nose pliers in a pinch, I don't recommend it. The round surface of the pliers' jaws does not grip the round surface of a jump ring very well. Using the other recommended pliers makes this task much easier.
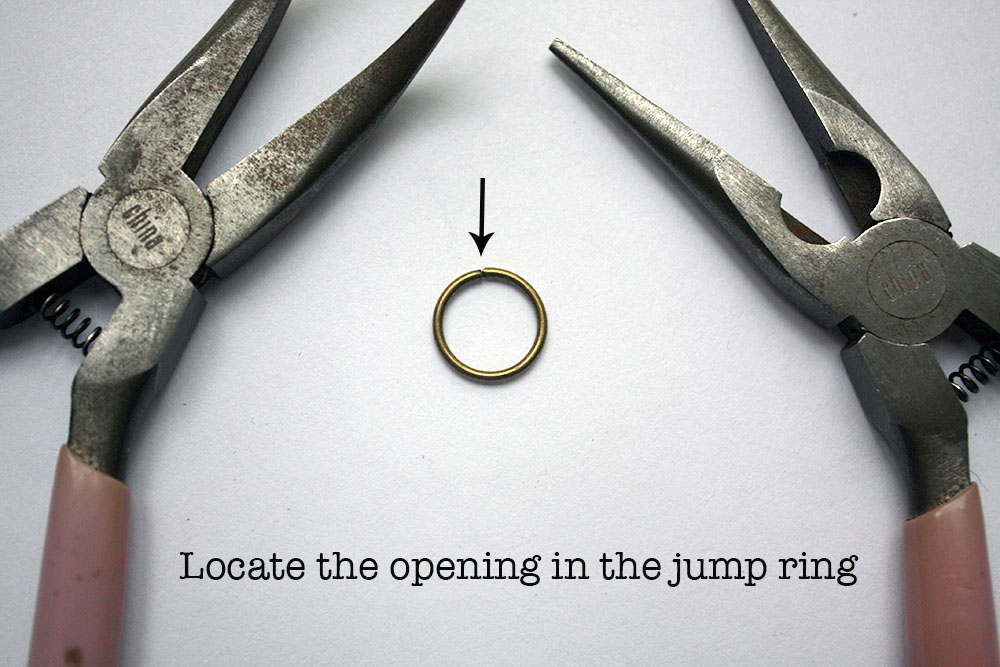
The first thing you want to do is to locate the small opening in the jump ring.

As explained in the image above, opening the jump ring is as simple as gripping the ring with the pliers positioned on either side of the slit. Twist the ring open by pushing one plier forward while pulling one back. Do this in one swift motion, and try not to over-extend the ring as you could weaken the metal.
Closing the ring is done in the same manner; place the pliers on either side of the opening, and twist the ring back into its original shape. You make have to rock it back and forth slightly several times to make sure the ring closes completely. You want as little space as possible in the split. Often times, you can feel/hear the two ends click together as an indication that it is closed completely.

It is important that you TWIST the jump ring open and closed. Do not try to pull it apart. You may end up with a wonky mess. This technique does take a little practice, and closing smaller jump rings is easier than larger, thicker-gauged ones. But, the tools are basic and the supplies inexpensive.
As I mentioned above, this lone skill really is all you need to complete a piece of jewelry.

In the pictures above, a single jump ring was used to connect a small charm to the loop on an ear wire to make an earring. The jump ring included on another charm was simply opened and closed onto a pre-made bracelet chain to start a charm bracelet. And, in the necklace, the pendant and clasp were attached to the chain with jump rings. In fact, every link in that particular chain could be considered a jump ring as they each have a slit opening.
And, that's it. Easy Peasy! If you can open and close a jump ring, you can make jewelry. Of course, that's not ALL there is to jewelry-making so I'll be adding more techniques to this series very soon. If you have any questions, comments, additions, or corrections to the information I've provided here, please don't hesitate to let me know!
I've shared this link on Saturday Sharefest at The Sway, Saturday Sparks Link Party at Pieced Pastimes, and Inspire Me Monday at Create with Joy.


I think it's one of the most helpful things to know when you start making jewelry - as most of us, in the past I tried to make some minor repairs or alterations on jewelry I owned but I didn't know this trick at that time and ended up ruining some pieces.
ReplyDelete"Great beginner tips—helpful for starting jewelry making! ✨🔨"
ReplyDelete